Does your laptop feel slow in our 3D pool and landscape design software? Do you feel sad when your line won’t keep up with your mouse?
After a long journey, searching many catacombs for the answers, on an adventure that would rival Indiana Jones, we think we have the solution to optimize PC performance!
Follow us on this adventure and let’s optimize your PC!
Disclaimer: Following us on this adventure will possibly help fix laptops that are slow in 2D and 3D. This adventure does not guarantee any gold, riches, or fancy money idols on top of pedestals.
1. Power Management (10 Second Fix!)
We start our Journey in the desert of Power Management!
The first setting is to get the power we need. Down at the bottom right of your screen you should see your Battery Icon. Right click the icon and a menu will appear.
![]()
Note: If this shows the High performance power plan, select it and you'll be set! You can then scroll down to the Intel Configuration options below. If you don’t see this option on your screen, click on More Power Options.
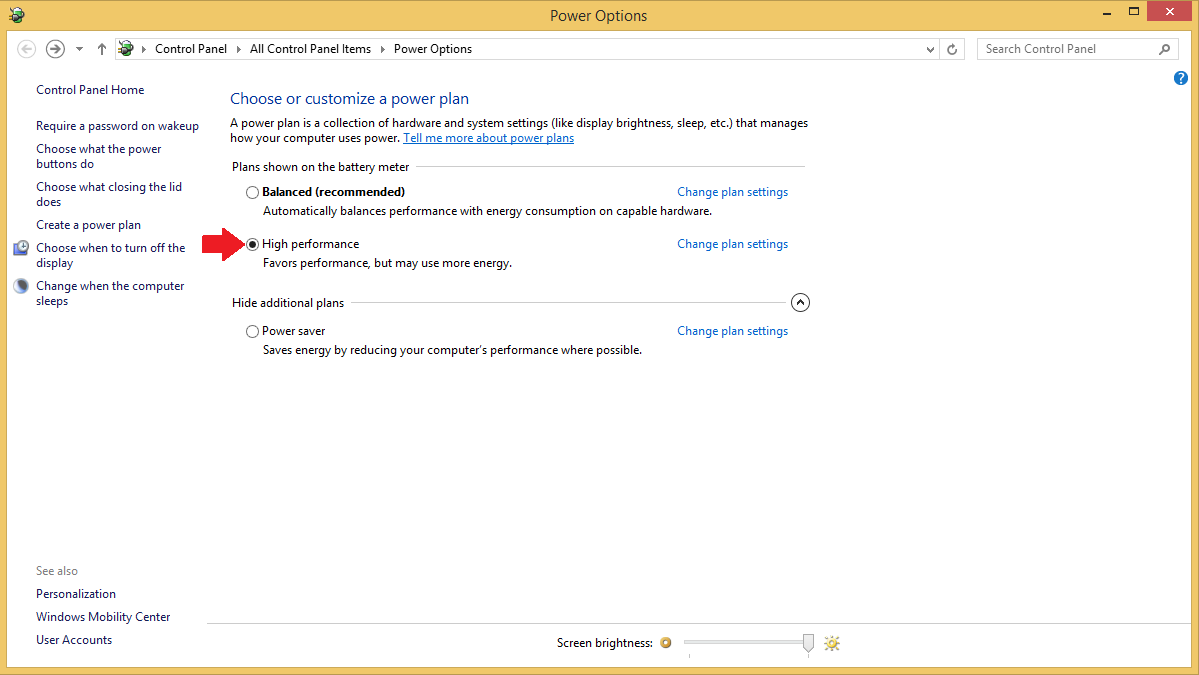
In Power Options, select High Performance to optimize your PC. Then close that window with the red X at the top.
2. Intel Configuration (20 Second Fix!)
Now that we have the power we need, let us travel into the jungle of Intel Configuration.
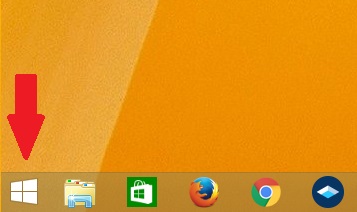 Down at the bottom left corner of your screen, you should see your Windows Icon. Left click on it.
This will pull you to your Start Menu. On this screen, just start typing "Intel" and the Intel HD Graphics Control Panel option will appear on the right side of your screen. Left click on it.
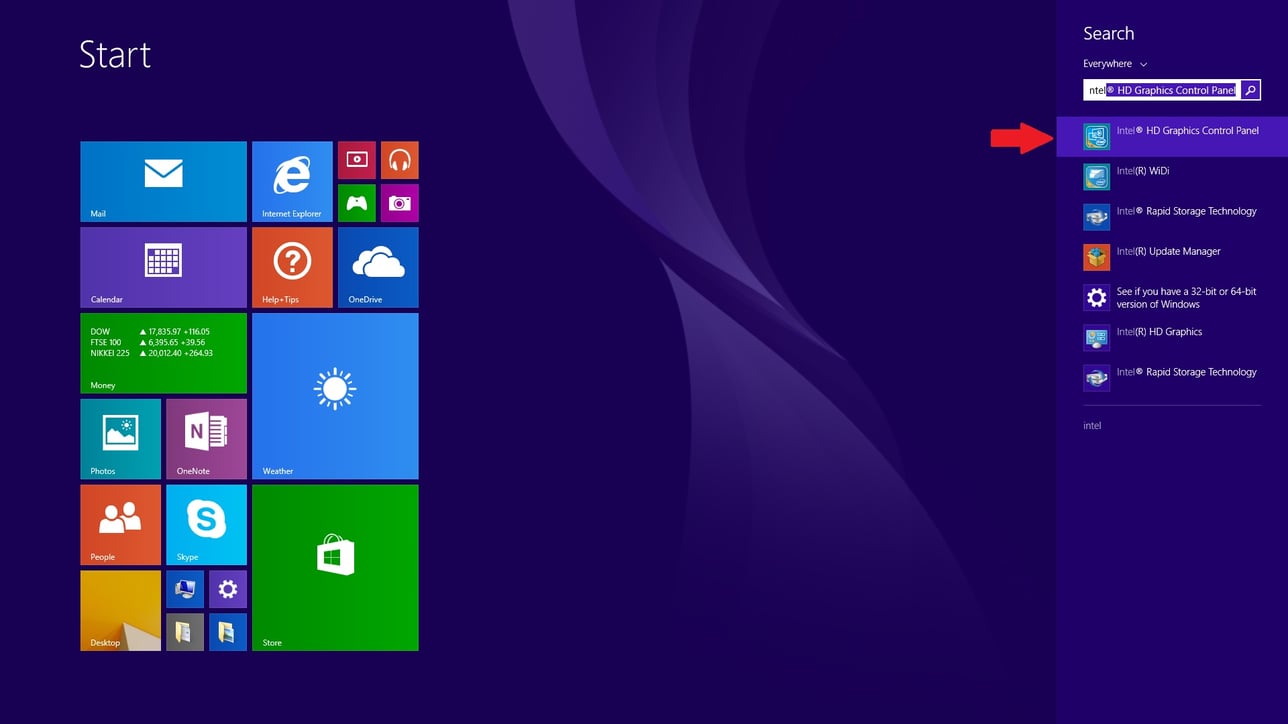
Note: You do not need to type anywhere specific. Just start typing after you've clicked on your Windows icon and your search results will appear.
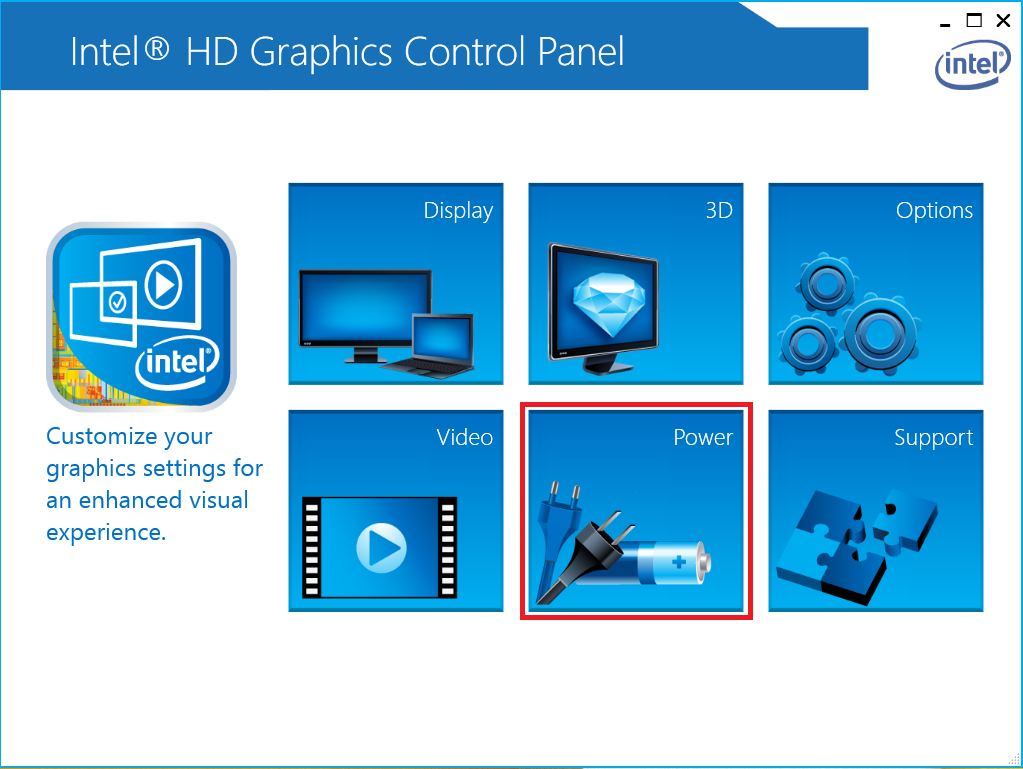
This should bring up your HD Graphics Control Panel. Click on the 3D button.
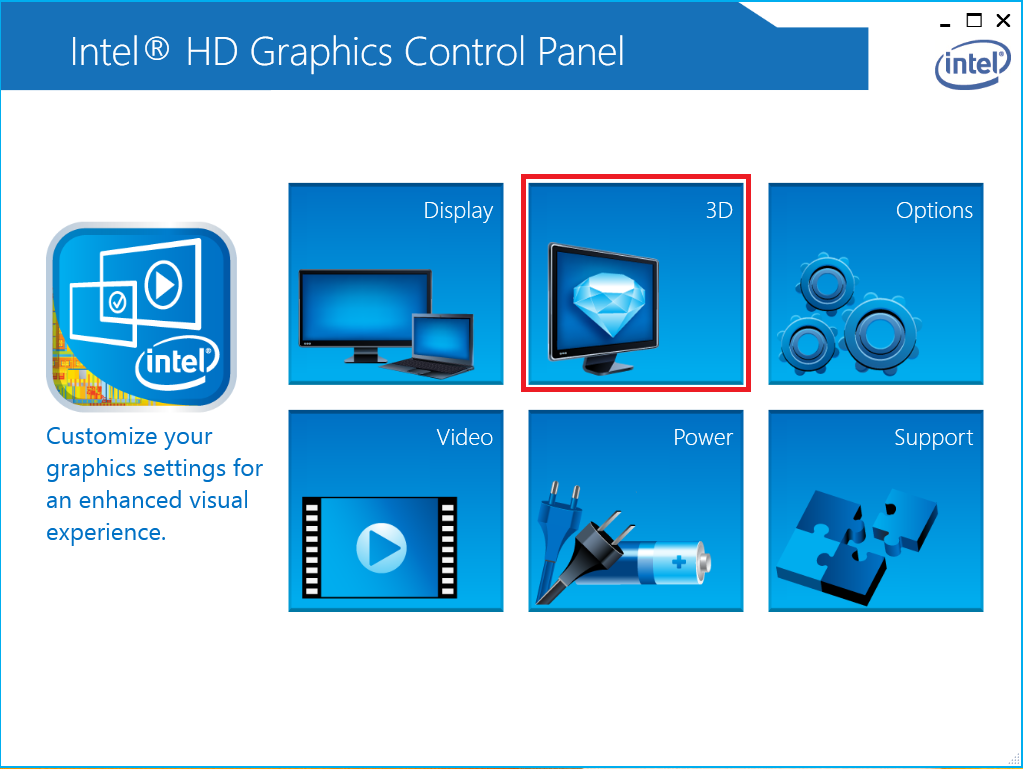
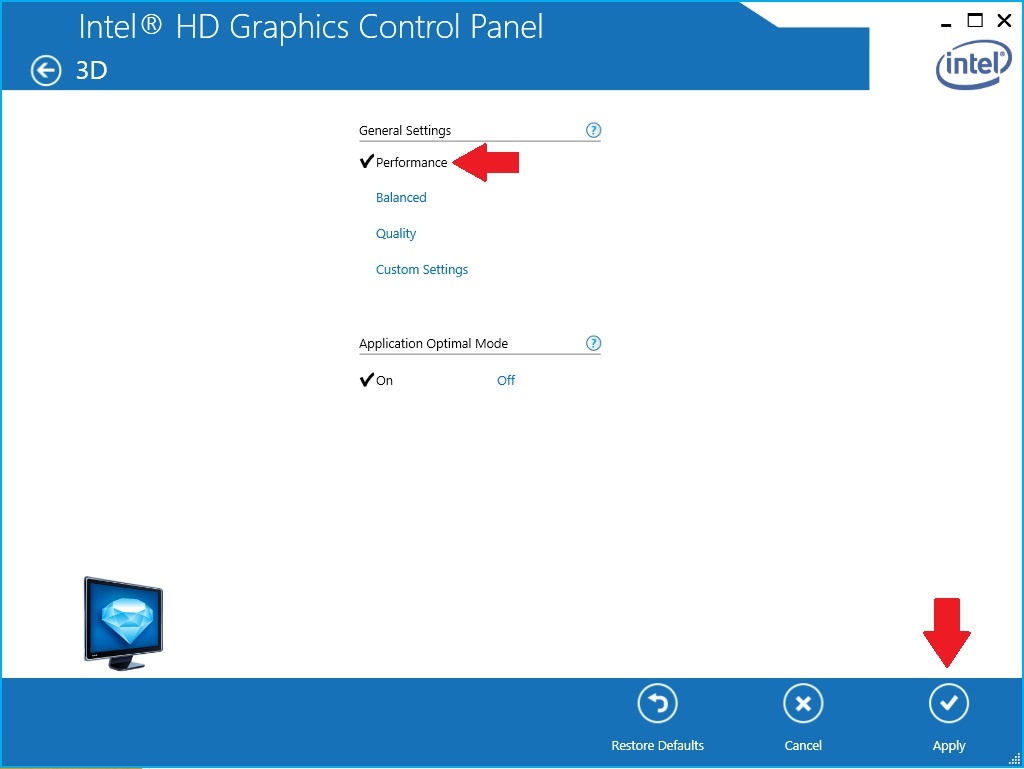
In the 3D section, under General Settings, select Performance to optimize PC performance. Then, down at the bottom right, click Apply. Once finished, click the back arrow at the top left.
Now we will click on Power!
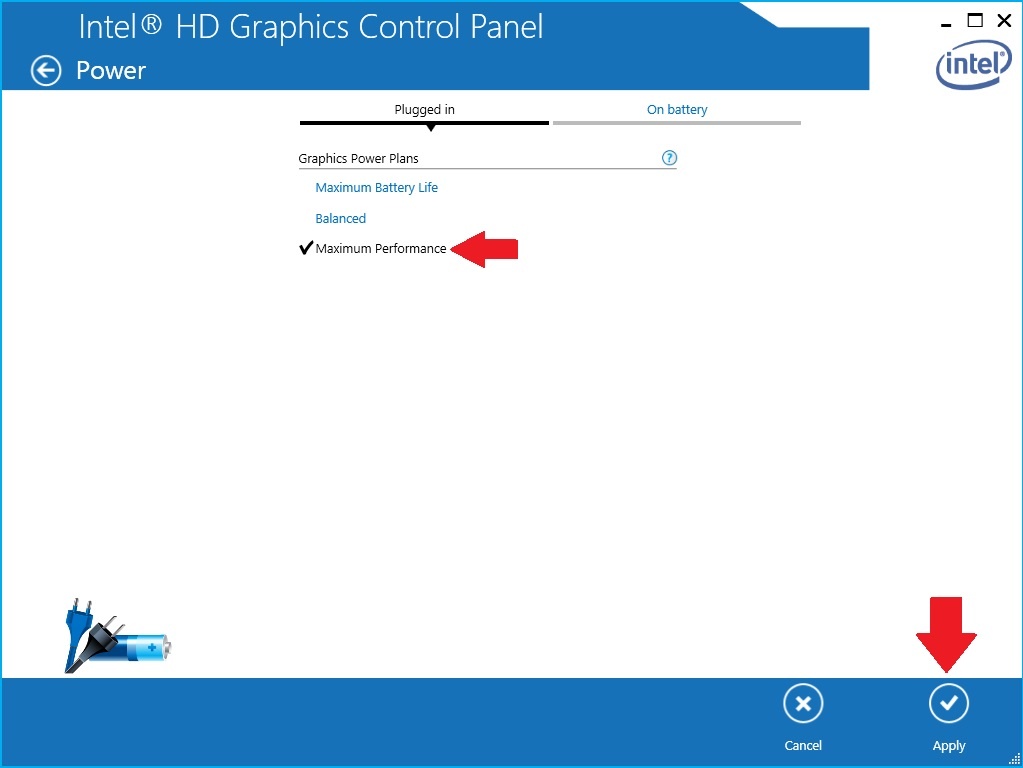
In the Power menu, under Plugged In, select Maximum Performance. Then click Apply. You can close this by hitting the X at the top right.
3. Nvidia Control Panel (20 Second Fix!)
 We have made it to the final (and most important) stop of our journey: the temple of Nvidia Control Panel.
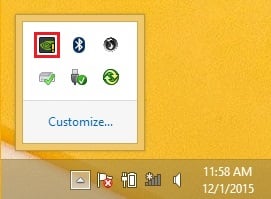
Down at the bottom right, to the left of the Battery Icon, you should see a small white arrow pointing up. Click that arrow and a menu will appear.
Right click on the Nvidia Icon and then left click on the Open NVIDIA Control Panel.
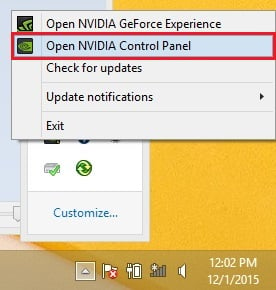
In your NVIDIA Control Panel you will have three things to do:
- On the left, click on Manage 3D Settings.
- In the center, click the drop down menu under Preferred Graphics Processor. Then choose High-Performance NVIDIA Processor.
- Then click Apply down at the bottom right to optimize your PC.
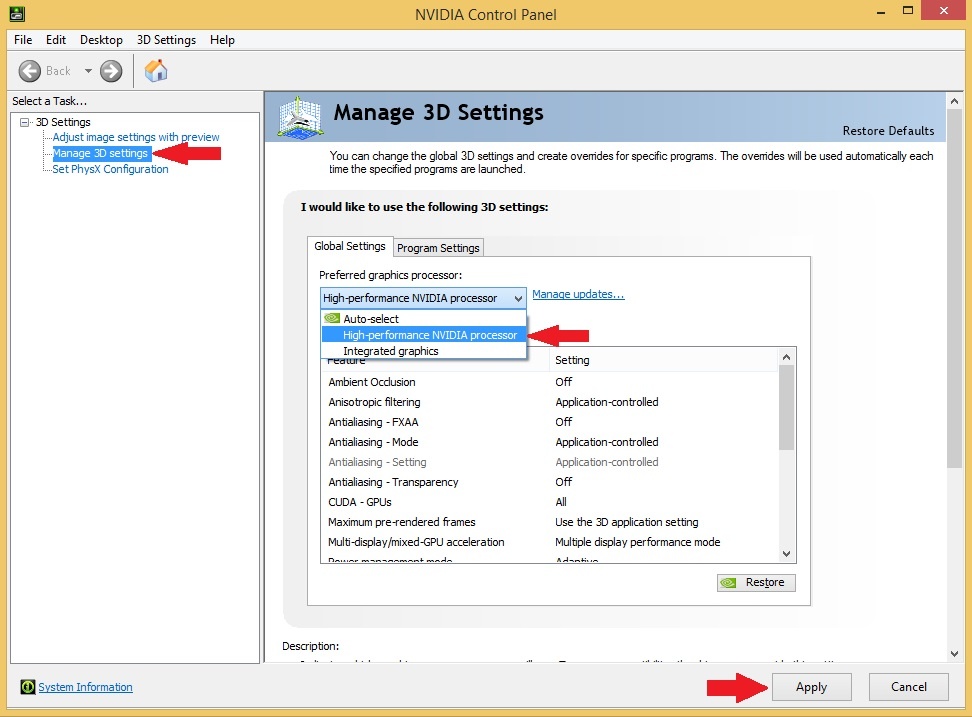
Once you're done, hit the red X up at the top right and you'll be set!
Whew, we made it back safe!
4. (Bonus Fix) Dumb "Energy Managers" (5 Second Fix)
On our journey, we found a program that can cause issues for some users. If you have a Lenovo (we're sorry) and run into issues (you will), look for a program called "Energy Manager". If you pull it up, it should look like this:
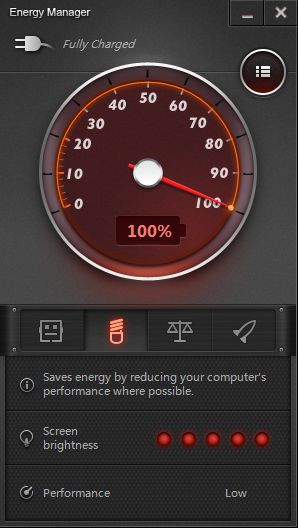
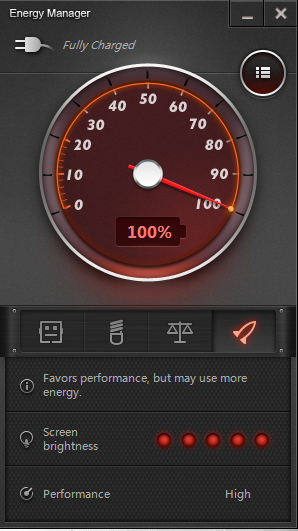
The image on the left is Energy Saving mode (this is BAD), which will slow your system down to an unusable crawl. The correct one, on the right, is the High Performance mode (this is GOOD). Hint: You can also fix this by getting a computer that's not Lenovo
If we find any more programs like this along our travels, we will let you know!
If you are still having any issues with your laptop after our journey, call our Adventurers at 1-800-778-8996 and we will be sure to help!


_Photos/Laptop_Speed/5X-Faster-Laptop.jpg)

 December 2, 2015


Comments